Hi Vegetarian Carnivores! I know we all have our favorite foods- foods that are just nostalgic to us. For some people I know it is mac and cheese, or a really good PB&J. As a South Indian by heritage kind of gal, that food to me is yogurt. And no, I am not talking about the Yoplait high sugar nonsense. Sorry, not sorry. I am talking about fresh curd- thick, tart, and lip smacking good! So here I present to you, my homemade vegan yogurt, super simple and foolproof in the Instant Pot.
Yogurt is my life
Yogurt is literally the one thing I ate every single day when I was a child without complaining. I was a majorly picky eater and often refused everything except some yogurt and veggies. When I decided I was going vegan I easily substituted milk, cheese was a challenge but totally doable, but yogurt was incredibly difficult. I tried really very hard to find a non dairy yogurt in the store- I tried all the brands, researched the best recipes, and read all the vegan blogs before I found one that kind of makes sense. And from that, I adapted this masterpiece.

Here’s the problem though…
The issue with store bought yogurt is that it is too sweet. Yes, even the “plain and unflavored” varieties. It was really confusing to me until I ate a parfait one day with one of them and then it clicked! Yogurt, at least in the western world, was perceived as a sweet thing. That explained the fad of yogurt with fruits, parfaits, and other sugary foods. I knew that I wasn’t going to get the level of tartness with anything store bought so it was back to the basics with homemaking yogurt.

Requirements for homemaking yogurt…
I had never made yogurt before- at least the dairy kind. But with the help of my trusty Instant Pot and its own yogurt setting, I was ensured an ideal environment for my cultures.
Updated Method: 2023
After ages, I decided that my original method wasn’t yielding as thick a result as I wanted, so I started poking around. If you’d like my original recipe, I have moved it to the end of this article.
My updated method will literally have your jaw on the floor. Here’s why: it doesn’t require any heating or cooling. It takes just 8 hours. It yields a thick and creamy and carve-able result.
We’re going to use a pure soy milk, which has just soybeans and water. Salt is fine too if that’s what you find. You want to keep in mind the importance of the quality of milk you use. Most refrigerated soy milk like Silk or Chobani has some kind of gum- gellan or xanthan gum. They are not bad ingredients and they’re not bad for you like some extreme “wellness gurus” on social media would have you believe. But for the purposes of homemaking yogurt, the gums will separate and get gross and gummy at the yogurt making temperature.
The key is buying cartons of them so they are at room temperature and shelf stable. I use the brand West Soy. This means I can stock up on them in my pantry and open as needed without struggling to fit it all in my fridge- major benefit! But the main reason you want a shelf stable one is that this recipe only works from a room temperature start- I wouldn’t try this with a fridge cold start.

The general rundown: Round 1
Keep in mind making yogurt is an iterative process. As I write this, it is March 2023, which means my original culture is almost 3 years old. The yogurt gets better and better as you keep using your culture to make the next batch.
You’re going to start your very first culture with one carton of room temperature soy milk and pour it into a steel container. It is best if the container is a thin bottom and not a heavy bottom. This affects the heat retention and can potentially make your yogurt a little sour. If that’s how you like it, go for it. But for me, I like it not sour and just nice and tart.
2 tablespoons of any unsweetened unflavored commercially available soy yogurt will do the trick. I know I said above that the commercial ones have taste, but we have to start somewhere. If you live near me, you are more than welcome to stop by and I can give you some amazing culture LOL
But I digress- since we are using such a small amount in comparison to the 32 oz of completely plain soymilk, the taste does not come through. Just be sure you make sure it is unsweetened and unflavored, or else you’ll get weird blueberry undertones, which you don’t want.
Once you have mixed the culture with the yogurt, place the steel container into the Instant Pot. No trivet. No water surrounding. Just place it directly. Close the lid, turn it to sealing mode, and hit Yogurt for 8 hours. Turn off the “keep warm” mode as the Yogurt mode is pretty warm as it is and any longer than 8 hours can make your yogurt go sour.
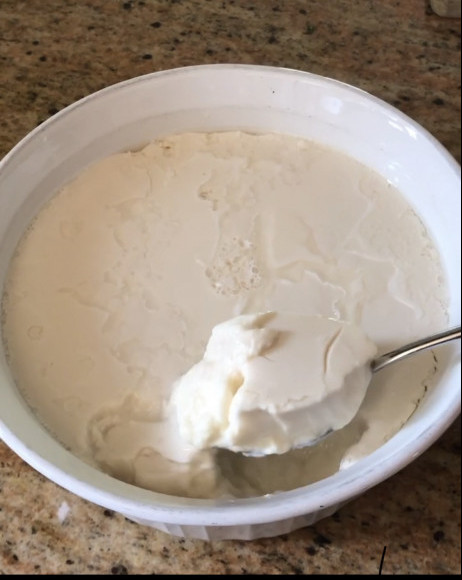
Just a waiting game! Put the yogurt into the fridge after 8 hours and it’ll solidify into pure magic. Pure carve-able magic.
A few notes.
- This process is an iterative process, meaning that each round gets better, thicker, and tastier. The very first time I made this, the yogurt was like a thick buttermilk and carried some raw soy flavor. It was not very good. But when I took some leftover yogurt from the not-so-good batch and did it again, the second round was noticeably better, and the round after that was super thick and tangy with almost no soy traces.
- What I have found is that if you leave the yogurt in the fridge for 2 weeks, it gets tangy enough to carry that taste over into the next round. I’ve been using that hack for the last so many rounds.
- Make sure you do not eat all of the yogurt. You want to leave 2-3 tablespoons worth at all times to serve as culture for the next batch. If you eat it all, you’re back to square one from the commercial yogurt and redoing all the culture work you previously did. So always keep some separate or eat until your container has a bit left on the bottom. It doesn’t need to be exact.
- While you are iterating and working on getting the taste ideal, I recommend tempering some mustard seeds, green chilis, curry leaves, and oil over the stove and adding that. It is a very common Indian spice addition to many dishes and gives the dish an oomph! It also works to mask any underlying undesirable taste. I don’t use it now that my culture is really good and the taste is identical to dairy yogurt, but I was doing that while I was perfecting it.

Ok so let’s get started! The ingredients are really very simple.
Ingredients
- 1 carton (32 oz) plain unsweetened soy yogurt
- 2 tablespoons culture (from store bought soy yogurt, or from your previous batch)
Instructions
- Pour your room temperature shelf stable soy yogurt into a thin bottom steel container.
- Stir in the culture and mix until well combined.
- Put the container in the Instant Pot directly- not on the rack and with no water underneath.
- Set to sealing.
- Press Yogurt and for 8 hours.
- Immediately store in the fridge until ready to use. This helps thicken it.
Notes
Original method: 2020. You can follow the recipe above from step 2 if you prefer to heat and cool your yogurt. And instead of 8 hours you can set it to 14 hours if you are using a glass container to set your yogurt. Glass is a poor conductor so that’s why it takes so long.
Here’s the general process. You’re going to heat up (preferably microwave at short intervals) the soymilk until it is warm. I know warm is a pretty generic term, but hear me out. You just want to kill off any bacteria causing impurities, but not kill the cultures. So it should be only warm and definitely nowhere near boiling when you put the cultures in. I like to microwave at 1 minute intervals and I find that 2 minutes is usually the sweet spot for warm enough but not culture-killing heat.


Could you please share yogurt recipes without soy milk. I can’t take soy products. 😩
Hi! I am working on alternative milk yogurts- so far soy is the most reliable, but my testing continues! Please do check back for more, and I can contact you when I have something ready 🙂